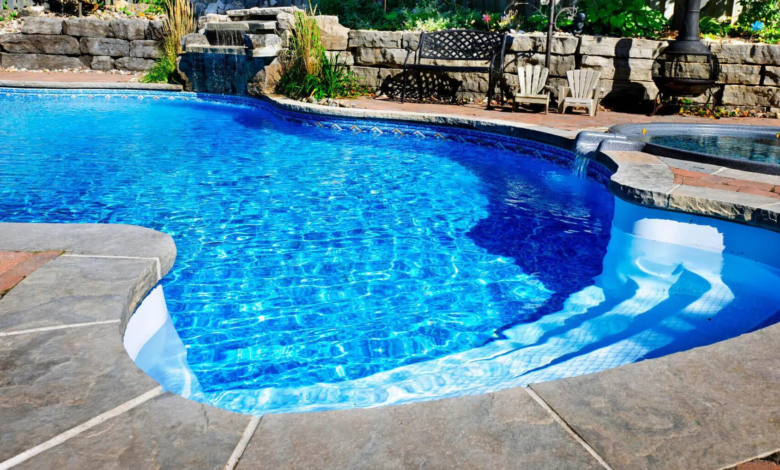
Explore the Best Types of Pool Pavers for a Stunning Poolside

A beautifully designed pool area not only enhances the aesthetic appeal of your home but also increases its value. One of the most effective ways to achieve this transformation is by using pool pavers. These versatile materials come in various styles and colors, allowing you to customize your pool area to match your personal taste.
In this article, we’ll explore the benefits of pool pavers, the types available, and the steps involved in installing them.
What Are Pool Pavers?
Definition and Overview
Pool pavers are specialized paving stones designed for use around swimming pools. They are crafted from durable materials like concrete, stone, or clay, and are engineered to withstand the elements, including water, sun, and heavy foot traffic. Pool pavers not only provide a stable and slip-resistant surface but also add an aesthetic charm to your outdoor space.
Benefits of Using Pool Pavers
- Durability: Pool pavers are built to last, even in harsh weather conditions. They are resistant to cracking and fading, ensuring a long-lasting appearance.
- Slip Resistance: Safety is paramount around pools. Pool pavers are designed with textured surfaces to prevent slipping, reducing the risk of accidents.
- Aesthetic Appeal: With a wide range of styles, colors, and textures, pool pavers can enhance the visual appeal of your pool area, creating a luxurious and inviting environment.
- Low Maintenance: Unlike other materials that may require frequent upkeep, pool pavers are easy to clean and maintain. Occasional sweeping and washing are typically all that’s needed.
Types of Pool Pavers
Concrete Pool Pavers
Concrete pavers are a popular choice due to their versatility and affordability. They come in various shapes, sizes, and colors, allowing you to create customized patterns. Concrete pavers can also be stamped or stained to mimic the look of natural stone.
Natural Stone Pool Pavers
Natural stone pavers, such as travertine, granite, and slate, offer a high-end look and feel. Each type of natural stone has unique characteristics, such as varying colors and textures. Natural stone pavers are known for their durability and elegance but tend to be more expensive than concrete options.
Clay Brick Pool Pavers
Clay brick pavers provide a classic and timeless appearance. They are fired at high temperatures, which makes them extremely durable and resistant to stains. Clay bricks are available in a range of earthy tones, adding warmth and character to your pool area.
Porcelain Pool Pavers
Porcelain pavers are known for their sleek, modern appearance and are available in numerous styles and colors. They are highly resistant to moisture and staining, making them an excellent choice for pool areas. Porcelain pavers are also low-maintenance and durable.
Steps to Install Pool Pavers
1. Plan and Design
Start by planning the layout and design of your pool area. Consider the size and shape of the pool, the surrounding space, and the overall aesthetic you want to achieve. Sketch a design and choose the type and color of pavers that complement your vision.
2. Prepare the Site
Proper preparation is crucial for a successful installation. Begin by marking the area where the pavers will be laid. Excavate the area to a depth of about 6 to 8 inches, depending on the type of paver and the base material required. Remove any grass, roots, or debris.
3. Install the Base
A stable base is essential for ensuring the longevity of your paver installation. Lay down a layer of crushed stone or gravel to provide drainage and stability. Use a compactor to level and compact the base material thoroughly.
4. Lay the Sand Bedding
Spread a layer of sand over the compacted base. This layer serves as a bed for the pavers, helping to level them and provide additional stability. Use a rake to distribute the sand evenly and then compact it with a plate compactor.
5. Install the Pavers
Begin laying the pavers according to your design. Start from one corner and work your way across the area, ensuring that the pavers are aligned and spaced evenly. Use spacers if necessary to maintain consistent gaps between the pavers.
6. Cut and Fit Pavers
You may need to cut some pavers to fit around edges and corners. Use a masonry saw or a paver splitter to make precise cuts. Ensure that the cut edges are smooth and fit well with the surrounding pavers.
7. Fill the Joints
Once all the pavers are in place, fill the joints with sand or a jointing compound. This step helps to lock the pavers in place and prevents weed growth. Sweep the sand into the joints and use a broom to remove any excess.
8. Compact the Pavers
Finally, use a plate compactor to press the pavers down and ensure they are firmly set in place. This process helps to settle the pavers and enhances the stability of the entire surface.
9. Clean and Seal
Clean the surface of the pavers to remove any residual sand or debris. Applying a sealant can help protect the pavers from staining and enhance their longevity. Follow the manufacturer’s instructions for the best results.
Conclusion
Installing pool pavers is an excellent way to enhance the look and functionality of your pool area. With a variety of options available, from durable concrete to elegant natural stone, you can create a space that perfectly matches your style and needs. By following the outlined steps, you can achieve a professional and long-lasting result that will provide both beauty and safety for years to come.


