Upgrading your car’s audio system can feel overwhelming, especially if you’re unsure where to begin. A smart starting point for most drivers is upgrading the factory-installed speakers with high-quality coaxial speakers. Coaxial speakers offer a balance between great sound, ease of installation, and affordability, making them ideal for those who want to enhance their in-car audio without diving too deeply into complex audio setups. In this guide, we’ll walk you through what coaxial speakers are, how they differ from factory speakers, and how to install them effectively in your vehicle.
Understanding Factory-Installed Speakers
Before you dive into upgrading, it’s important to understand why your factory-installed speakers fall short. Most cars come equipped with full-range speakers, which are basic and designed to reproduce sound across the entire audio spectrum. While they may work fine for casual listeners, they tend to lack depth and clarity. Highs might sound tinny, mids can be muffled, and bass frequencies are often weak or distorted. This is because factory speakers are built to be cost-effective, using cheaper materials and lacking the specialized components that make aftermarket speakers sound so much better.
Why Coaxial Speakers Are a Smart Upgrade
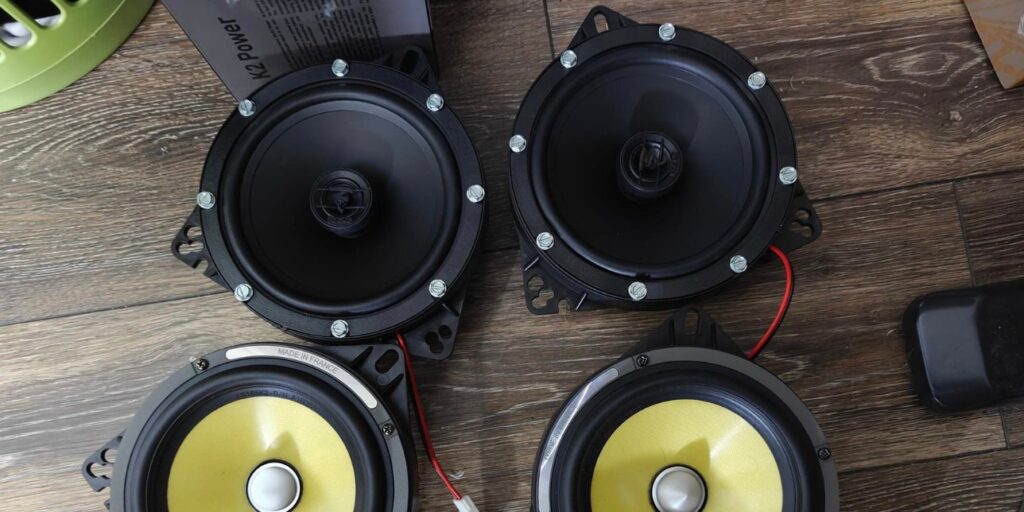
Coaxial speakers, also known as full-range speakers, are an all-in-one solution that combines multiple drivers—typically a woofer and a tweeter—into a single unit. This design allows them to handle a wider range of frequencies, delivering much more clarity and depth compared to factory-installed speakers.
For example, the woofer in a coaxial speaker is responsible for the lower and midrange frequencies, while the integrated tweeter handles the high frequencies. Some advanced coaxial speakers even come with additional drivers, such as midrange drivers, for an even fuller sound. The result is a speaker system that offers better separation between highs, mids, and lows, creating a richer, more immersive listening experience.
Choosing the Right Coaxial Speakers for Your Car
When upgrading to coaxial speakers, it’s crucial to select models that are compatible with your vehicle’s existing speaker mounts. This means finding the right size and shape that will fit directly into the factory speaker locations without requiring modifications to your car’s interior. Common sizes include 6.5 inches, 5.25 inches, and 6×9 inches, but it’s always a good idea to check your car’s manual or measure the existing speakers to ensure compatibility.
Along with size, you should also consider the materials used in the construction of the speakers. High-quality materials such as polypropylene cones, silk tweeters, and rubber surrounds will provide better sound performance and durability compared to the cheap paper cones and foam surrounds typically found in factory speakers.
For a selection of high-quality coaxial speakers designed to improve your car’s audio experience, visit Auto Lautsprecher.
How to Install Coaxial Speakers
One of the biggest advantages of coaxial speakers is their ease of installation. Here’s a step-by-step guide to help you install them in your car:
Step 1: Gather Your Tools and Prepare Your Workspace
Before starting, make sure you have all the necessary tools at hand. You’ll need:
- A panel removal tool (to safely remove the door panel without damaging the clips)
- A set of screwdrivers (typically Phillips and flathead)
- A socket wrench (for any bolts holding the panel in place)
- Wire cutters or a crimping tool (in case you need to modify wiring connections)
- Your new speakers, mounting rings, and wiring harness adapters
- A clean, flat surface to lay out the door panel once removed
Ensure that your car is parked on level ground and that there is adequate lighting. Disconnect the battery to avoid any electrical issues, especially when working with the vehicle’s wiring system.
Step 2: Remove the Door Panel (Instead of Just the Speaker Grille)
In most new vehicles, the speaker grille is fixed and integrated into the door panel, so the entire panel must be removed to access the speaker. Follow these steps to carefully remove the door panel:
- Turn Off the Car and Disconnect the Battery: This ensures you won’t cause any short circuits or electrical issues when working on the vehicle.
- Locate the Screws and Bolts: Before attempting to pry off the panel, look for any screws that might be holding it in place. These are usually located near the door handle, inside the armrest, or under the trim pieces. Use a screwdriver to remove them.
- Use a Panel Removal Tool: Once the screws are removed, use the panel removal tool to gently pry the door panel away from the door frame. The panel is usually held in place by plastic clips that snap into the door frame. Be careful and work your way around the panel slowly, ensuring you don’t break any clips.
- Detach Electrical Connections: Once the door panel is loose, there will likely be electrical connections attached to it for the power windows, door locks, and possibly speaker wiring. Carefully disconnect these connectors before fully removing the panel.
- Remove the Panel and Set It Aside: After disconnecting all necessary components, carefully lift the panel away from the door and place it on a clean surface where it won’t get damaged.
Step 3: Remove the Factory Speakers
Now that the door panel is removed, you can access the factory-installed speakers. Here’s how to safely remove them:
- Locate the Screws or Bolts Holding the Speaker in Place: Most speakers are held in place with screws or bolts. Use a screwdriver or socket wrench to remove these fasteners.
- Disconnect the Wiring Harness: Behind the speaker, you’ll find a wiring harness that connects the speaker to the car’s audio system. Gently pull the wiring harness from the speaker. If the harness doesn’t easily come off, check for any clips or tabs holding it in place and carefully release them.
- Remove the Factory Speaker: With the wiring disconnected, gently pull the factory speaker out of its mounting location. If the speaker is stuck, be careful not to apply too much force—ensure all screws and connectors are fully detached before pulling the speaker out.
Step 4: Prepare for the Installation of the New Speakers
Before installing the new speakers, it’s important to check a few things to ensure a smooth and proper fit:
- Clean the Speaker Opening: Dust and debris can accumulate in the speaker mount over time. Use a soft cloth to wipe down the area to ensure a clean surface for the new speaker.
- Check the Size of the Speaker Opening: Make sure the new speakers you’ve purchased are the right size for your vehicle. Many vehicles come with 6.5-inch speakers, but it’s always good to double-check the dimensions.
- Install Speaker Mounting Rings: If your new speakers require mounting rings for proper installation, attach them to the speaker mounting location. The mounting rings help ensure the new speakers fit securely into the original speaker openings without any gaps.
Step 5: Connect the New Speakers
Once the old speakers are removed, it’s time to install the new ones. This process varies slightly depending on the type of speakers you’ve chosen, but here’s a general guide:
- Attach the Wiring Harness Adapter: Many aftermarket speakers come with a wiring harness adapter that connects the speaker to your car’s original wiring. This eliminates the need for cutting or splicing wires, making the installation process quicker and safer. Attach the adapter to the car’s wiring harness, and then plug the other end into the new speaker.
- Secure the New Speaker: Position the new speaker into the speaker mount, ensuring it fits securely into place. Use the screws or bolts provided with the new speaker to fasten it to the car. Be sure the speaker is tight and there’s no movement or wobbling.
Step 6: Test the New Speakers
Before reattaching the door panel, it’s important to test the new speakers to ensure they’re working properly:
- Reconnect the Battery: With the new speakers installed, reconnect your car’s battery.
- Turn on the Car Stereo: Power up the stereo and play some music. Make sure all the speakers are functioning correctly, and listen for any signs of distortion or improper wiring.
- Adjust the Sound Settings: If your new speakers come with external crossovers or tweeter level controls, take this time to fine-tune the sound settings for optimal performance.
Step 7: Reinstall the Door Panel
After confirming that the speakers are working correctly, you can now reinstall the door panel:
- Reconnect Electrical Components: Reattach any electrical connectors for the power windows, locks, and other components.
- Snap the Panel Back Into Place: Line up the clips on the door panel with the corresponding holes in the door frame. Press the panel firmly to snap the clips back into place.
- Replace the Screws and Bolts: Finally, replace any screws or bolts you removed earlier, securing the door panel back in place.
Conclusion
In newer vehicles, replacing factory speakers requires removing the entire door panel, not just the speaker grille. While this process may seem more complicated, following these steps ensures a smooth installation without damaging your car’s interior. With the right tools and careful attention, upgrading your car’s audio system will significantly enhance your driving experience, providing clear and powerful sound for every journey.